DIY Textured Walls
Textured walls have always been a hit in 20th century homes, especially the classic knock down method. Textured drywall topping makes a beautiful cloud like composition that looks great with metallic paints. Textured walls are a favorite of professional painters because of the the way it patches up any lines in the drywall or wallpaper making the appearance that the wall is seamlessly connected. In this Peak Pro Blog we will teach you how to create textured walls using the knock down method.
What you will need for DIY textured walls:
-Dry wall light weight joint compound
-Electric hopper (Spray rig, with a hose, compressor and a hopper to hold your compound). You can typically rent these out at your local hardware store.
-Drill with a whip on the end to stir the dry wall compound
-Large bucket
-Trowel
Before you start your DIY textured walls:
DIY textured walls is a messy job, so make sure your mask the entirety of your room and remove all furniture. If you need more information on how to mask a room try these helpful blogs; How to Mask a Window, How To Mask a Ceiling Before you Paint, How to Rearrange Furniture for Painting Efficiency, How to Protect Flooring When Painting Your Home .
How to make a drywall spray mud:
Mix drywall joint compound with water in your large bucket and stir with your drill until the consistency of the mud is still thick but falls off the whip on your drill.
Things you should know when spraying drywall spray mud:
Although you want your texture to look natural, consistency is key when applying the drywall spray mud. Before you start, consider what you want your textured walls to look like? Do you want a light subtle texture, or a statement texture? Using a wide tip and low pressure will cause a rougher texture, whereas a smaller tip and a higher pressure will create a smooth texture. When spraying the drywall joint compound you will want to hold your electric spray hopper about two feet from the wall at a 90 degree angle. Use a circular or side to side motion to apply the drywall spray mud. Make sure to never stop in one place for too long, or else the mud will lay on too thick.
Knock down method: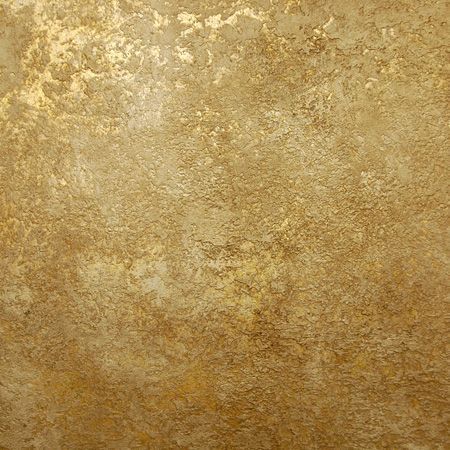
You will want to wait until the texture is partly dry. A good signifier is that the sheen on the texture will begin to disappear. Then you can grab your trowel and gently knock down the texture. The goal is not to smooth it completely, but keep an even pressure and gently drag your tool along the wall. You will notice that if you smear the texture too early it will all blend together and not give you the desired texture. When doing the knock down method, direction is unspecific when knocking down the small mountains of the spray mud.
How to fix your textured drywall:
Textured drywall isn’t always an easy process, but there are ways to make your wall look its best. If the texture dries and looks too thick, just sand it down until it looks more consistent. If you mess up your consistency, and the drywall spray mud is still wet, you can take your trowel and scrape it off and put it back in your hopper and try again. WARNING! Do not do this with drying compound, you want an even consistency of drywall spray mud going into the hopper. Patchwork on a textured wall will never look perfect but make sure to take your time and follow the same steps that you did when you initially applied your textured wall.
Wondering how to paint your new drywall? Read this helpful blog! Would you prefer your Denver commercial painting company and their professional team of home painters to do this task for you? Request a quote here for interior or exterior painting Denver or Denver commercial painting. Our experienced Denver home painters for homes exteriors will give your home a new look with fastest and cheapest estimate you can find! Also serving Austin Texas!
The post DIY Textured Walls appeared first on Peak Professional Painting.
Ready to work with Peak Pro Painting?
Let's connect! We’re here to help.
Send us a message and we’ll be in touch.
Or give us a call today at 720-399-7325